Shifting and remodeling information between databases is a typical want for a lot of organizations. Duplicating information from a manufacturing database to a decrease or lateral atmosphere and masking personally identifiable info (PII) to adjust to laws allows growth, testing, and reporting with out impacting essential techniques or exposing delicate buyer information. Nevertheless, manually anonymizing cloned info might be taxing for safety and database groups.
You should utilize AWS Glue Studio to arrange information replication and masks PII with no coding required. AWS Glue Studio visible editor offers a low-code graphic atmosphere to construct, run, and monitor extract, remodel, and cargo (ETL) scripts. Behind the scenes, AWS Glue handles underlying useful resource provisioning, job monitoring, and retries. There’s no infrastructure to handle, so you possibly can give attention to quickly constructing compliant information flows between key techniques.
On this submit, I’ll stroll you thru easy methods to copy information from one Amazon Relational Database Service (Amazon RDS) for PostgreSQL database to a different, whereas scrubbing PII alongside the best way utilizing AWS Glue. You’ll learn to put together a multi-account atmosphere to entry the databases from AWS Glue, and easy methods to mannequin an ETL information stream that mechanically masks PII as a part of the switch course of, in order that no delicate info might be copied to the goal database in its authentic kind. By the tip, you’ll be capable of quickly construct information motion pipelines between information sources and targets, that may cover PII to be able to shield particular person identities, without having to put in writing code.
Resolution overview
The next diagram illustrates the answer structure:
The answer makes use of AWS Glue as an ETL engine to extract information from the supply Amazon RDS database. Constructed-in information transformations then scrub columns containing PII utilizing pre-defined masking capabilities. Lastly, the AWS Glue ETL job inserts privacy-protected information into the goal Amazon RDS database.
This resolution employs a number of AWS accounts. Having multi-account environments is an AWS greatest follow to assist isolate and handle your purposes and information. The AWS Glue account proven within the diagram is a devoted account that facilitates the creation and administration of all crucial AWS Glue assets. This resolution works throughout a broad array of connections that AWS Glue helps, so you possibly can centralize the orchestration in a single devoted AWS account.
It is very important spotlight the next notes about this resolution:
- Following AWS greatest practices, the three AWS accounts mentioned are a part of a company, however this isn’t obligatory for this resolution to work.
- This resolution is appropriate to be used circumstances that don’t require real-time replication and may run on a schedule or be initiated by occasions.
Walkthrough
To implement this resolution, this information walks you thru the next steps:
- Allow connectivity from the AWS Glue account to the supply and goal accounts
- Create AWS Glue elements for the ETL job
- Create and run the AWS Glue ETL job
- Confirm outcomes
Conditions
For this walkthrough, we’re utilizing Amazon RDS for PostgreSQL 13.14-R1. Be aware that the answer will work with different variations and database engines that help the identical JDBC driver variations as AWS Glue. See JDBC connections for additional particulars.
To comply with together with this submit, you must have the next stipulations:
- Three AWS accounts as follows:
- Supply account: Hosts the supply Amazon RDS for PostgreSQL database. The database accommodates a desk with delicate info and resides inside a non-public subnet. For future reference, report the related digital non-public cloud (VPC) ID, safety group, and personal subnets related to the Amazon RDS database.
- Goal account: Accommodates the goal Amazon RDS for PostgreSQL database, with the identical desk construction because the supply desk, initially empty. The database resides inside a non-public subnet. Equally, write down the related VPC ID, safety group ID and personal subnets.
- AWS Glue account: This devoted account holds a VPC, a non-public subnet, and a safety group. As talked about within the AWS Glue documentation, the safety group features a self-referencing inbound rule for
All TCPand TCP ports (0-65535) to permit AWS Glue to speak with its elements.
The next determine exhibits a self-referencing inbound rule wanted on the AWS Glue account safety group.
- Be certain the three VPC CIDRs don’t overlap with one another, as proven within the following desk:
| VPC | Personal subnet | |
|---|---|---|
| Supply account | 10.2.0.0/16 | 10.2.10.0/24 |
| AWS Glue account | 10.1.0.0/16 | 10.1.10.0/24 |
| Goal account | 10.3.0.0/16 | 10.3.10.0/24 |
The next diagram illustrates the atmosphere with all stipulations:
To streamline the method of establishing the stipulations, you possibly can comply with the instructions within the README file on this GitHub repository.
Database tables
For this instance, each supply and goal databases comprise a buyer desk with the very same construction. The previous is prepopulated with information as proven within the following determine:
The AWS Glue ETL job you’ll create focuses on masking delicate info inside particular columns. These are last_name, e mail, phone_number, ssn and notes.
If you wish to use the identical desk construction and information, the SQL statements are supplied within the GitHub repository.
Step 1 – Allow connectivity from the AWS Glue account to the supply and goal accounts
When creating an AWS Glue ETL job, present the AWS IAM function, VPC ID, subnet ID, and safety teams wanted for AWS Glue to entry the JDBC databases. See AWS Glue: The way it works for additional particulars.
In our instance, the function, teams, and different info are within the devoted AWS Glue account. Nevertheless, for AWS Glue to connect with the databases, you might want to allow entry to supply and goal databases out of your AWS Glue account’s subnet and safety group.
To allow entry, first you inter-connect the VPCs. This may be finished utilizing VPC peering or AWS Transit Gateway. For this instance, we use VPC peering. Alternatively, you should utilize an S3 bucket as an middleman storage location. See Organising community entry to information shops for additional particulars.
Observe these steps:
- Peer AWS Glue account VPC with the database VPCs
- Replace the route tables
- Replace the database safety teams
Peer AWS Glue account VPC with database VPCs
Full the next steps within the AWS VPC console:
- On the AWS Glue account, create two VPC peering connections as described in Create VPC peering connection, one for the supply account VPC, and one for the goal account VPC.
- On the supply account, settle for the VPC peering request. For directions, see Settle for VPC peering connection
- On the goal account, settle for the VPC peering request as properly.
- On the AWS Glue account, allow DNS Settings on every peering connection. This permits AWS Glue to resolve the non-public IP deal with of your databases. For directions, comply with Allow DNS decision for VPC peering connection.
After finishing the previous steps, the record of peering connections on the AWS Glue account ought to appear to be the next determine: Be aware that supply and goal account VPCs are usually not peered collectively. Connectivity between the 2 accounts isn’t wanted.
Replace subnet route tables
This step will allow visitors from the AWS Glue account VPC to the VPC subnets affiliate to the databases within the supply and goal accounts.
Full the next steps within the AWS VPC console:
- On the AWS Glue account’s route desk, for every VPC peering connection, add one route to every non-public subnet related to the database. These routes allow AWS Glue to ascertain a connection to the databases and restrict visitors from the AWS Glue account to solely the subnets related to the databases.
- On the supply account’s route desk of the non-public subnets related to the database, add one route for the VPC peering with the AWS Glue account. This route will permit visitors again to the AWS Glue account.
- Repeat step 2 on the goal account’s route desk.
For directions on easy methods to replace route tables, see Work with route tables.
Replace database safety teams
This step is required to permit visitors from the AWS Glue account’s safety group to the supply and goal safety teams related to the databases.
For directions on easy methods to replace safety teams, see Work with safety teams.
Full the next steps within the AWS VPC console:
- On the supply account’s database safety group, add an inbound rule with Kind
PostgreSQLand Supply, the AWS Glue account safety group. - Repeat step 1 from the goal account’s database safety group.
The next diagram exhibits the atmosphere with connectivity enabled from the AWS Glue account to the supply and goal accounts:
Step 2 – Create AWS Glue elements for the ETL job
The subsequent process is to create the AWS Glue elements to synchronize the supply and goal database schemas with the AWS Glue Knowledge Catalog.
Observe these steps:
- Create an AWS Glue Connection for every Amazon RDS database.
- Create AWS Glue Crawlers to populate the Knowledge Catalog.
- Run the crawlers.
Create AWS Glue connections
Connections allow AWS Glue to entry your databases. The primary profit of making AWS Glue connections is that connections save time by not making you must specify all connection particulars each time you create a job. You possibly can then reuse connections when creating jobs in AWS Glue Studio with out having to manually enter connection particulars every time. This makes the job creation course of extra constant and quicker.
Full these steps on the AWS Glue account:
- On the AWS Glue console, select the Knowledge connections hyperlink on the navigation pane.
- Select Create connection and comply with the directions within the Create connection wizard:
- In Select information supply, select JDBC as information supply.
- In Configure connection:
- In Set Properties, for Identify enter
Supply DB connection-Postgresql.
- Repeat steps 1 and a pair of to create the connection to the goal Amazon RDS database. Identify the connection
Goal DB connection-Postgresql.
Now you’ve two connections, one for every Amazon RDS database.
Create AWS Glue crawlers
AWS Glue crawlers assist you to automate information discovery and cataloging from information sources and targets. Crawlers discover information shops and auto-generate metadata to populate the Knowledge Catalog, registering found tables within the Knowledge Catalog. This lets you uncover and work with the info to construct ETL jobs.
To create a crawler for every Amazon RDS database, full the next steps on the AWS Glue account:
- On the AWS Glue console, select Crawlers within the navigation pane.
- Select Create crawler and comply with the directions within the Add crawler wizard:
- In Set crawler properties, for Identify enter
Supply PostgreSQL database crawler. - In Selected information sources and classifiers, select Not but.
- In Add information supply, for Knowledge supply select JDBC, as proven within the following determine:

- For Connection, select
Supply DB Connection - Postgresql. - For Embrace path, enter the trail of your database together with the schema. For our instance, the trail is
sourcedb/cx/%the placesourcedbis the identify of the database, andcxthe schema with thebuyerdesk. - In Configure safety settings, select the AWS IAM service function created part of the stipulations.
- In Set output and scheduling, since we don’t have a database but within the Knowledge Catalog to retailer the supply database metadata, select Add database and create a database named
sourcedb-postgresql.
- In Set crawler properties, for Identify enter
- Repeat steps 1 and a pair of to create a crawler for the goal database:
- In Set crawler properties, for Identify enter
Goal PostgreSQL database crawler. - In Add information supply, for Connection, select
Goal DB Connection-Postgresql, and for Embrace path entertargetdb/cx/%. - In Add database, for Identify enter
targetdb-postgresql.
- In Set crawler properties, for Identify enter
Now you’ve two crawlers, one for every Amazon RDS database, as proven within the following determine: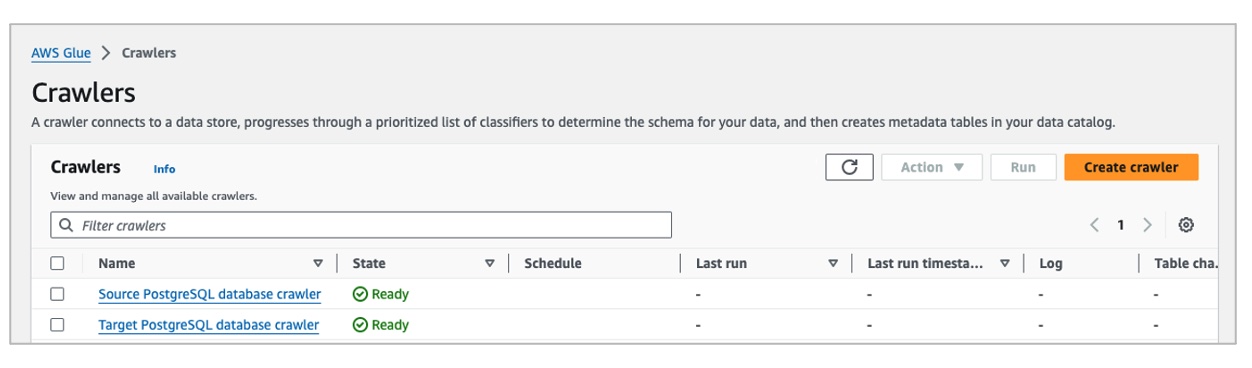
Run the crawlers
Subsequent, run the crawlers. Once you run a crawler, the crawler connects to the designated information retailer and mechanically populates the Knowledge Catalog with metadata desk definitions (columns, information varieties, partitions, and so forth). This protects time over manually defining schemas.
From the Crawlers record, choose each Supply PostgreSQL database crawler and Goal PostgreSQL database crawler, and select Run.
When completed, every crawler creates a desk within the Knowledge Catalog. These tables are the metadata illustration of the buyer tables.
You now have all of the assets to start out creating AWS Glue ETL jobs!
Step 3 – Create and run the AWS Glue ETL Job
The proposed ETL job runs 4 duties:
- Supply information extraction – Establishes a connection to the Amazon RDS supply database and extracts the info to copy.
- PII detection and scrubbing.
- Knowledge transformation – Adjusts and removes pointless fields.
- Goal information loading – Establishes a connection to the goal Amazon RDS database and inserts information with masked PII.
Let’s bounce into AWS Glue Studio to create the AWS Glue ETL job.
- Sign up to the AWS Glue console along with your AWS Glue account.
- Select ETL jobs within the navigation pane.
- Select Visible ETL as proven within the following determine:

Activity 1 – Supply information extraction
Add a node to connect with the Amazon RDS supply database:
- Select AWS Glue Knowledge Catalog from the Sources. This provides a information supply node to the canvas.
- On the Knowledge supply properties panel, choose
sourcedb-postgresqldatabase andsource_cx_customerdesk from the Knowledge Catalog as proven within the following determine:

Activity 2 – PII detection and scrubbing
To detect and masks PII, choose Detect Delicate Knowledge node from the Transforms tab.
Let’s take a deeper look into the Rework choices on the properties panel for the Detect Delicate Knowledge node:
- First, you possibly can select the way you need the info to be scanned. You possibly can choose Discover delicate information in every row or Discover columns that comprise delicate information as proven within the following determine. Selecting the previous scans all rows for complete PII identification, whereas the latter scans a pattern for PII location at decrease value.

Deciding on Discover delicate information in every row lets you specify fine-grained motion overrides. If you realize your information, with fine-grained actions you possibly can exclude sure columns from detection. You may as well customise the entities to detect for each column in your dataset and skip entities that you realize aren’t in particular columns. This permits your jobs to be extra performant by eliminating pointless detection requires these entities and carry out actions distinctive to every column and entity mixture.
In our instance, we all know our information and we wish to apply fine-grained actions to particular columns, so let’s choose Discover delicate information in every row. We’ll discover fine-grained actions additional under.
- Subsequent, you choose the forms of delicate info to detect. Take a while to discover the three completely different choices.
In our instance, once more as a result of we all know the info, let’s choose Choose particular patterns. For Chosen patterns, select Individual’s identify, Electronic mail Handle, Credit score Card, Social Safety Quantity (SSN) and US Cellphone as proven within the following determine. Be aware that some patterns, equivalent to SSNs, apply particularly to the US and may not detect PII information for different nations. However there can be found classes relevant to different nations, and you may also use common expressions in AWS Glue Studio to create detection entities to assist meet your wants.

- Subsequent, choose the extent of detection sensitivity. Go away the default worth (
Excessive). - Subsequent, select the worldwide motion to tackle detected entities. Choose REDACT and enter
****because the Redaction Textual content. - Subsequent, you possibly can specify fine-grained actions (overrides). Overrides are elective, however in our instance, we wish to exclude sure columns from detection, scan sure PII entity varieties on particular columns solely, and specify completely different redaction textual content settings for various entity varieties.
Select Add to specify the fine-grained motion for every entity as proven within the following determine:
Activity 3 – Knowledge transformation
When the Detect Delicate Knowledge node runs, it converts the id column to string sort and it provides a column named DetectedEntities with PII detection metadata to the output. We don’t have to retailer such metadata info within the goal desk, and we have to convert the id column again to integer, so let’s add a Change Schema remodel node to the ETL job, as proven within the following determine. This can make these adjustments for us.
Be aware: It’s essential to choose the DetectedEntities Drop checkbox for the remodel node to drop the added discipline.
Activity 4 – Goal information loading
The final process for the ETL job is to ascertain a connection to the goal database and insert the info with PII masked:
- Select AWS Glue Knowledge Catalog from the Targets. This provides a information goal node to the canvas.
- On the Knowledge goal properties panel, select
targetdb-postgresqlandtarget_cx_customer, as proven within the following determine.

Save and run the ETL job
- From the Job particulars tab, for Identify, enter
ETL - Replicate buyer information. - For IAM Function, select the AWS Glue function created as a part of the stipulations.
- Select Save, then select Run.
Monitor the job till it efficiently finishes from Job run monitoring on the navigation pane.
Step 4 – Confirm the outcomes
Connect with the Amazon RDS goal database and confirm that the replicated rows comprise the scrubbed PII information, confirming delicate info was masked correctly in transit between databases as proven within the following determine:
And that’s it! With AWS Glue Studio, you possibly can create ETL jobs to repeat information between databases and remodel it alongside the best way with none coding. Attempt different forms of delicate info for securing your delicate information throughout replication. Additionally attempt including and mixing a number of and heterogenous information sources and targets.
Clear up
To scrub up the assets created:
- Delete the AWS Glue ETL job, crawlers, Knowledge Catalog databases, and connections.
- Delete the VPC peering connections.
- Delete the routes added to the route tables, and inbound guidelines added to the safety teams on the three AWS accounts.
- On the AWS Glue account, delete related Amazon S3 objects. These are within the S3 bucket with
aws-glue-assets-account_id-areain its identify, the placeaccount-idis your AWS Glue account ID, andareais the AWS Area you used. - Delete the Amazon RDS databases you created should you not want them. For those who used the GitHub repository, then delete the AWS CloudFormation stacks.
Conclusion
On this submit, you realized easy methods to use AWS Glue Studio to construct an ETL job that copies information from one Amazon RDS database to a different and mechanically detects PII information and masks the info in-flight, with out writing code.
Through the use of AWS Glue for database replication, organizations can remove handbook processes to search out hidden PII and bespoke scripting to remodel it by constructing centralized, seen information sanitization pipelines. This improves safety and compliance, and speeds time-to-market for check or analytics information provisioning.
Concerning the Writer
Monica Alcalde Angel is a Senior Options Architect within the Monetary Providers, Fintech staff at AWS. She works with Blockchain and Crypto AWS prospects, serving to them speed up their time to worth when utilizing AWS. She lives in New York Metropolis, and outdoors of labor, she is enthusiastic about touring.